Discover the ultimate cheek filler before and after guide. Explore real transformations, exact ML dosages (1ml vs 2ml), and how fillers act as structural support.
| Aesthetic Goal / Style | Target Placement Area | Best Filler Brands | Average Amount Needed | Estimated Cost (USD) | Expected Longevity |
| The Subtle Refresh (Natural, hydrated glow) | Medial (Apples of the cheeks) | Restylane Contour, Juvederm Voluma | 1.0 ML (0.5 ML per side) | $600 – $800 | 12 – 18 Months |
| The “Snatched” Contour (Model-like bone definition) | Lateral (High Cheekbones / Zygomatic Arch) | Restylane Lyft, Juvederm Voluma | 2.0 ML (1.0 ML per side) | $1,200 – $1,600 | 18 – 24 Months |
| The Ogee Curve (Youthful S-Curve restoration) | Multi-Layer (Medial & Lateral combined) | Juvederm Voluma, Radiesse | 2.0 ML – 3.0 ML | $1,500 – $2,400 | 18 – 24+ Months |
| The Liquid Facelift (Anti-aging, lifting lower face) | Full Mid-Face Restoration | Juvederm Voluma, Sculptra, Radiesse | 3.0 ML – 5.0 ML+ | $2,500 – $4,000+ | 18 – 24+ Months |
More Than Just Volume—It’s About Structure
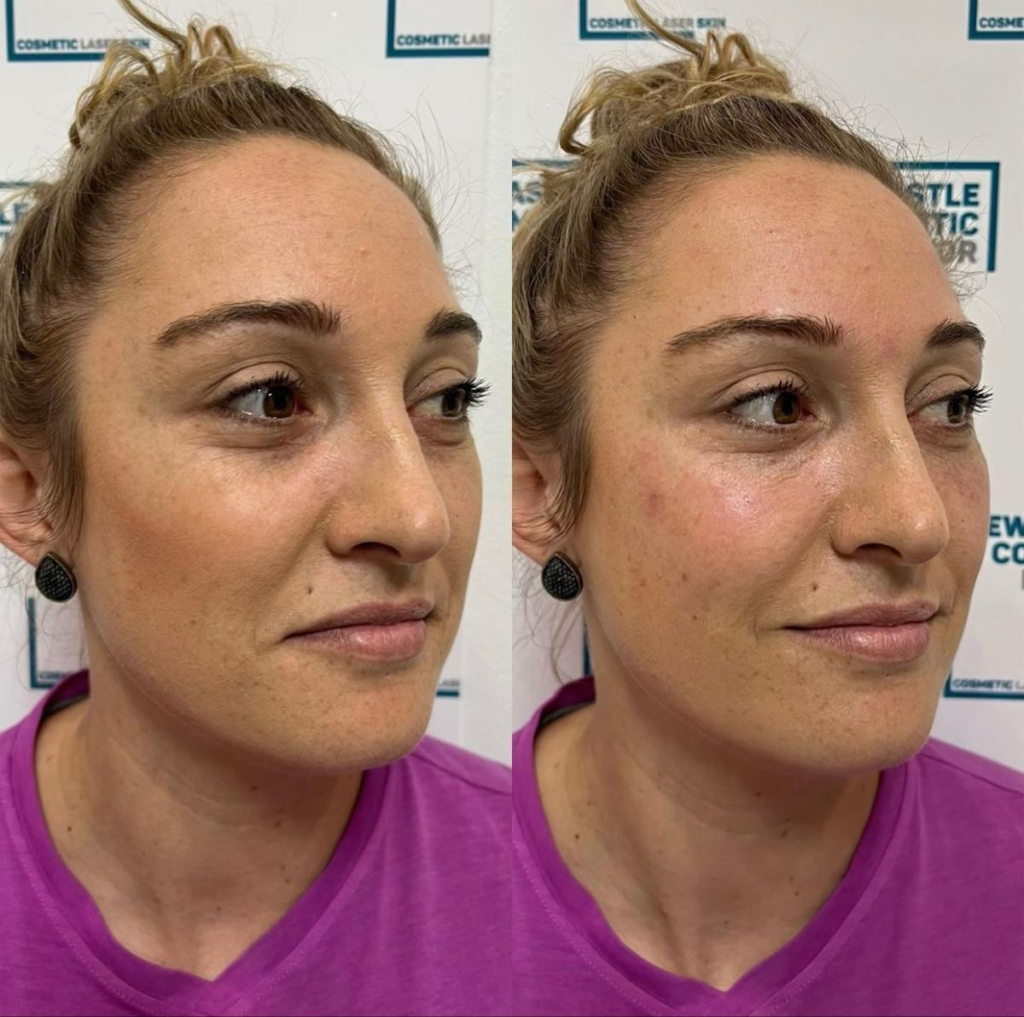
If you have been searching for cheek filler before and after photos, you have likely seen some jaw-dropping transformations. But have you ever wondered why some results look incredibly natural and model-like, while others look puffy or “overfilled”?
The top aesthetic clinics in the world know a secret: Cheek filler is not just about adding volume; it is about providing structural support.
Whether you are in your 20s looking for that sharp, “snatched” high-fashion contour, or in your 40s wanting to lift sagging skin and restore a youthful glow, the mid-face is the anchor of your entire facial aesthetic. In Part 1 of this ultimate, deep-dive guide, we are stripping away the social media filters. We will explore exactly how different ML dosages work, how your specific face shape dictates needle placement, and the real-life transformations you can expect.
The “Before” – Why Does the Mid-Face Deflate or Look Flat?
Before we can appreciate the “after,” we must understand the “before.” When patients walk into a clinic, they usually present one of two completely different physiological backgrounds:
1. The Aging Mid-Face (Volume & Bone Loss)
Aging doesn’t just happen on the surface of the skin; it happens deep within.
- Malar Fat Pad Atrophy: In our youth, facial fat is tightly packed high on the cheekbones. As we age, these fat pads shrink and succumb to gravity, sliding downwards. This causes under-eye hollows (tear troughs) and deepens the nasolabial folds (smile lines).
- Bone Resorption: Believe it or not, our facial skeleton shrinks over time. The cheekbones (zygomatic bones) recede, leaving the overlying skin with no structural “tent pole” to hold it up.
2. The Genetic “Flat” Profile (Lack of Definition)
For younger patients, the issue is often genetic. Some individuals are born with a flatter maxilla (upper jaw/mid-face). Even with perfect skin and zero aging, their face may look round or lack that coveted “V-shape” jawline because the upper cheekbones don’t protrude enough to cast natural shadows.
The Solution: Dermal fillers (usually made of Hyaluronic Acid) act as instant bone and fat replacements.
The “Motion vs. Rest” Aesthetic (The Secret to Natural Results)
One major factor that most cheek filler before and after galleries miss is how the face looks in motion.
A poorly done cheek filler might look great in a still selfie (at rest), but when the patient smiles (in motion), the filler bunches up near the eyes, creating the dreaded “pillow face.”
- Master Injector Technique: To achieve a flawless “after,” the filler must be placed deep onto the bone (supraperiosteal placement) rather than superficially under the skin. When placed deeply, the filler mimics real bone. It stays put when you smile, allowing your natural muscles to glide seamlessly over it.
Decoding the Dosages – How Many MLs Do You Really Need?
The most common fear among patients is “looking fake.” This fear often leads them to request too little filler. Let’s break down the reality of ML (milliliter) dosages. (Remember: 1 full syringe is only 1/5th of a teaspoon!)
The number of syringes you need directly impacts your total price—see our full guide on cheek filler cost by ML, city, and clinic type to understand real-world pricing in 2026.
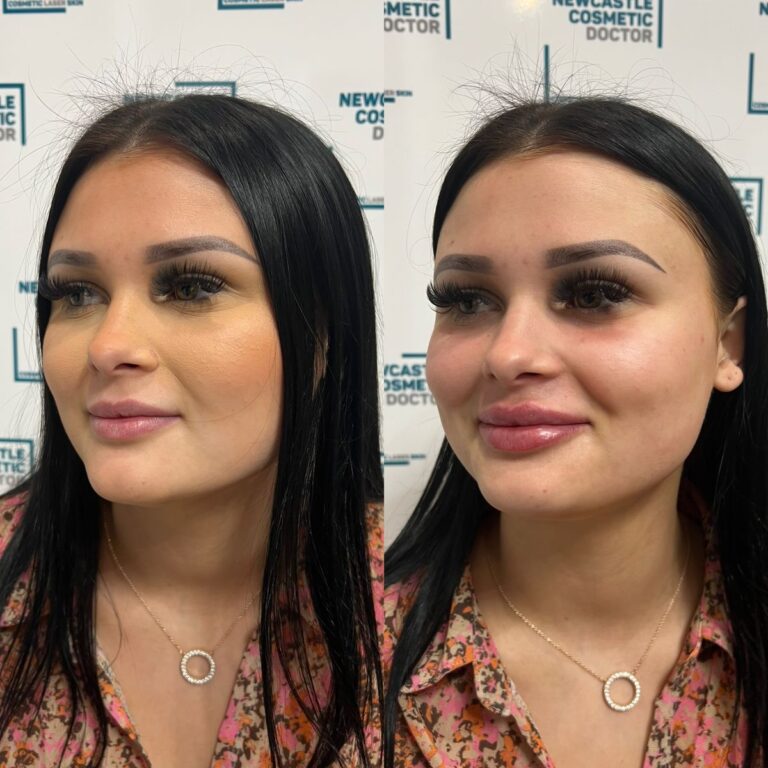
1. The 1ml Transformation (The “Micro-Tweak”)
- Amount: 0.5ml per side.
- The Goal: Subtle hydration and a tiny structural boost.
- Best For: First-timers in their 20s or 30s who just want to look “less tired,” or patients maintaining a previous full treatment.
- The Reality: 1ml will not give you a drastic, sculpted cheekbone. It is a strictly “did she or didn’t she?” amount.
2. The 2ml Standard (The True Contour)
- Amount: 1.0ml per side.
- The Goal: Noticeable contouring, mimicking the look of perfect makeup bronzer, or lifting mild lower-face sagging.
- Best For: Most standard patients. This is the sweet spot for creating the “Ogee Curve” (the youthful S-curve of the face).
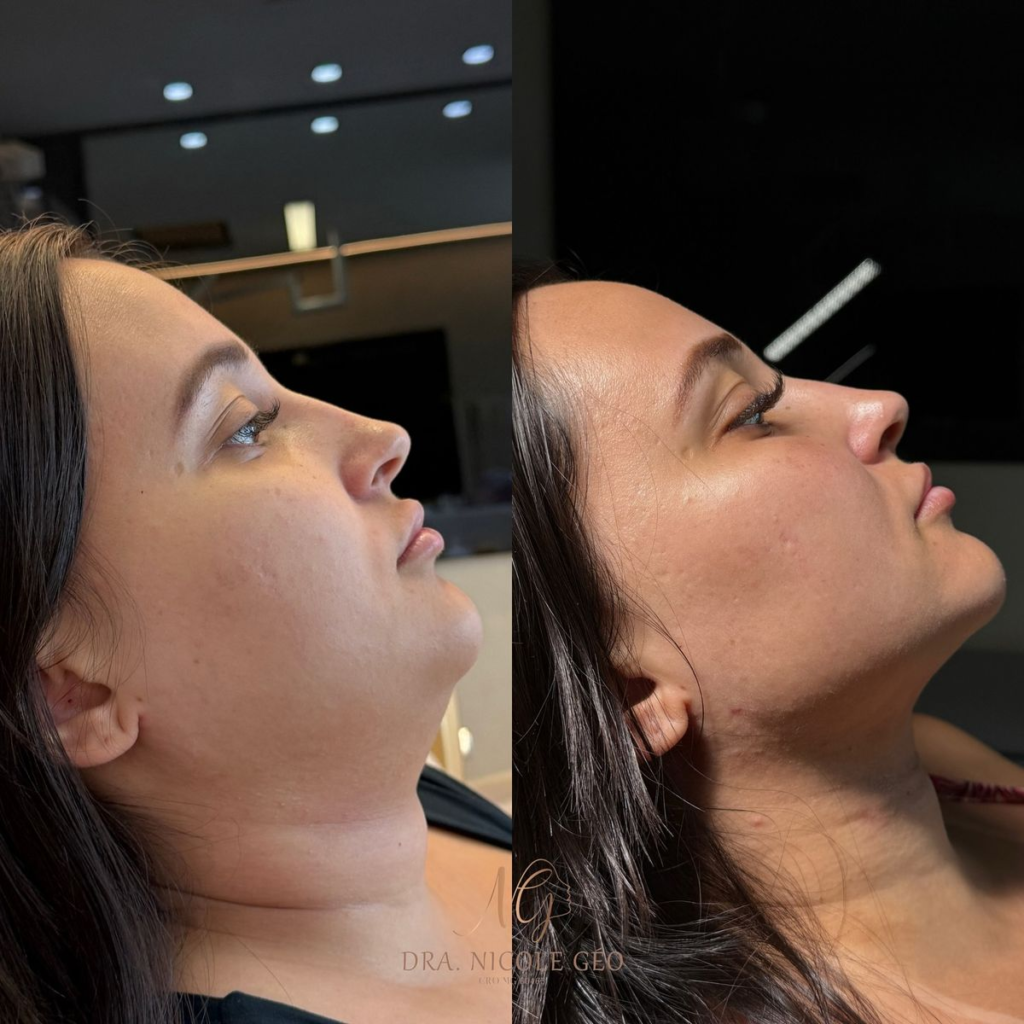
3. The 3ml to 5ml+ (The Liquid Facelift)
- Amount: 1.5ml to 2.5ml+ per side.
- The Goal: Total facial reconstruction and anti-aging lift.
- Best For: Patients over 40 with significant volume loss, or individuals who have lost a massive amount of weight (e.g., Ozempic face).
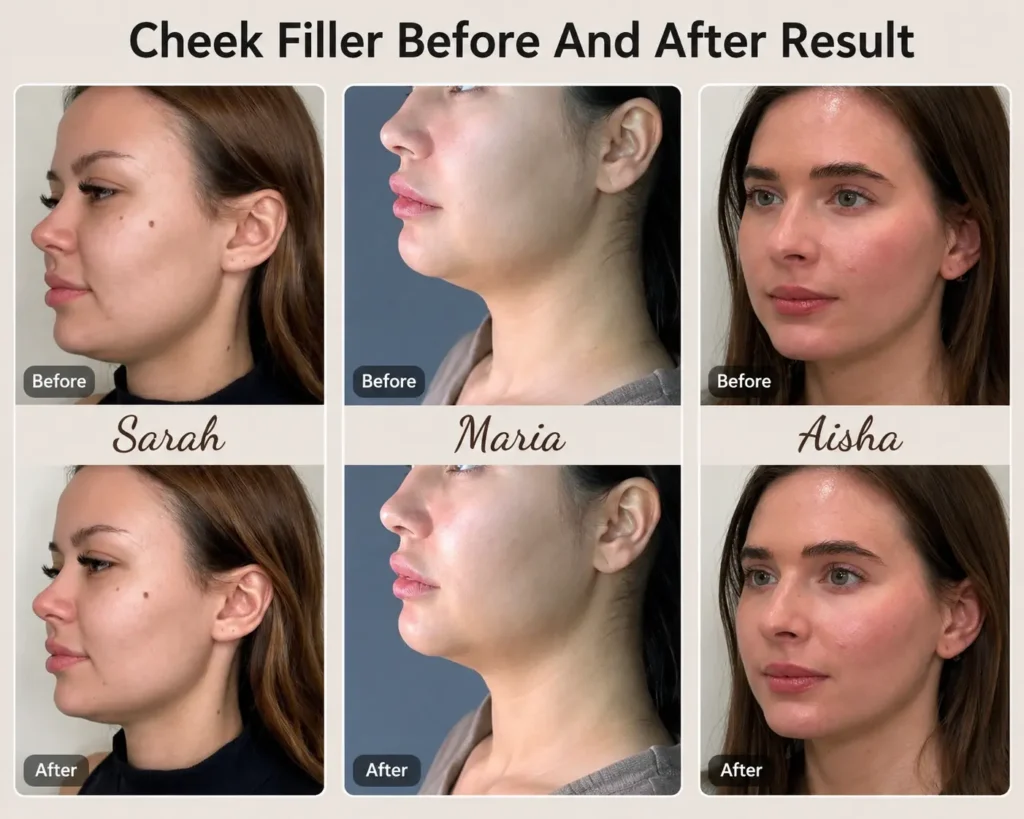
The Real-Life Transformation Table (Case Studies)
Let’s look at how these numbers translate into real-world results. Here are three distinct patient profiles.
| Patient Profile | The “Before” Concern | ML & Technique Used | Total Cost | The “After” Result |
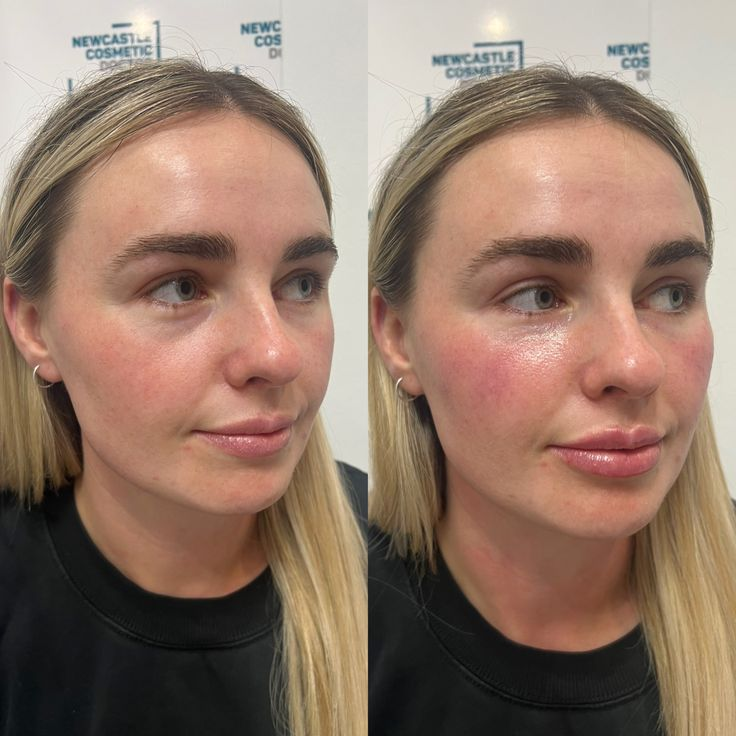
| 1. Sarah (Age 26) | Round face, wants “snatched” model-like bone structure. | 2.0 ML (Restylane Lyft) injected laterally on the high cheekbone. | $1,400 | Immediate slimming effect. The high contour pulled the lower skin up, creating a sharper jawline. |
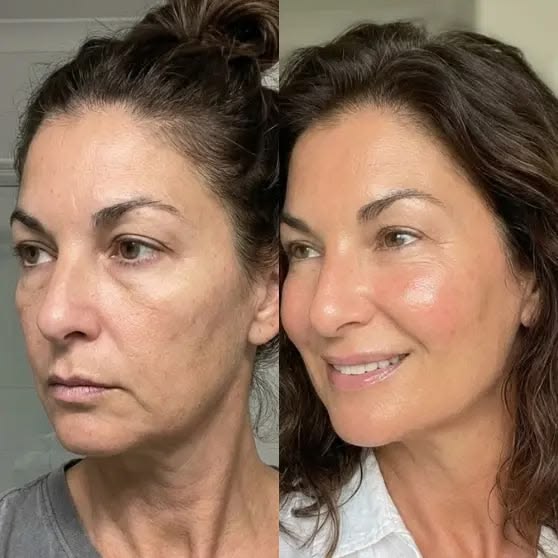
| 2. Maria (Age 45) | Sunken under-eyes, heavy smile lines, looking “tired.” | 3.0 ML (Juvederm Voluma) injected medially (apples) and laterally. | $2,500 | The “Liquid Facelift.” Restored the Ogee Curve, erasing 10 years of aging by physically lifting the mid-face. |
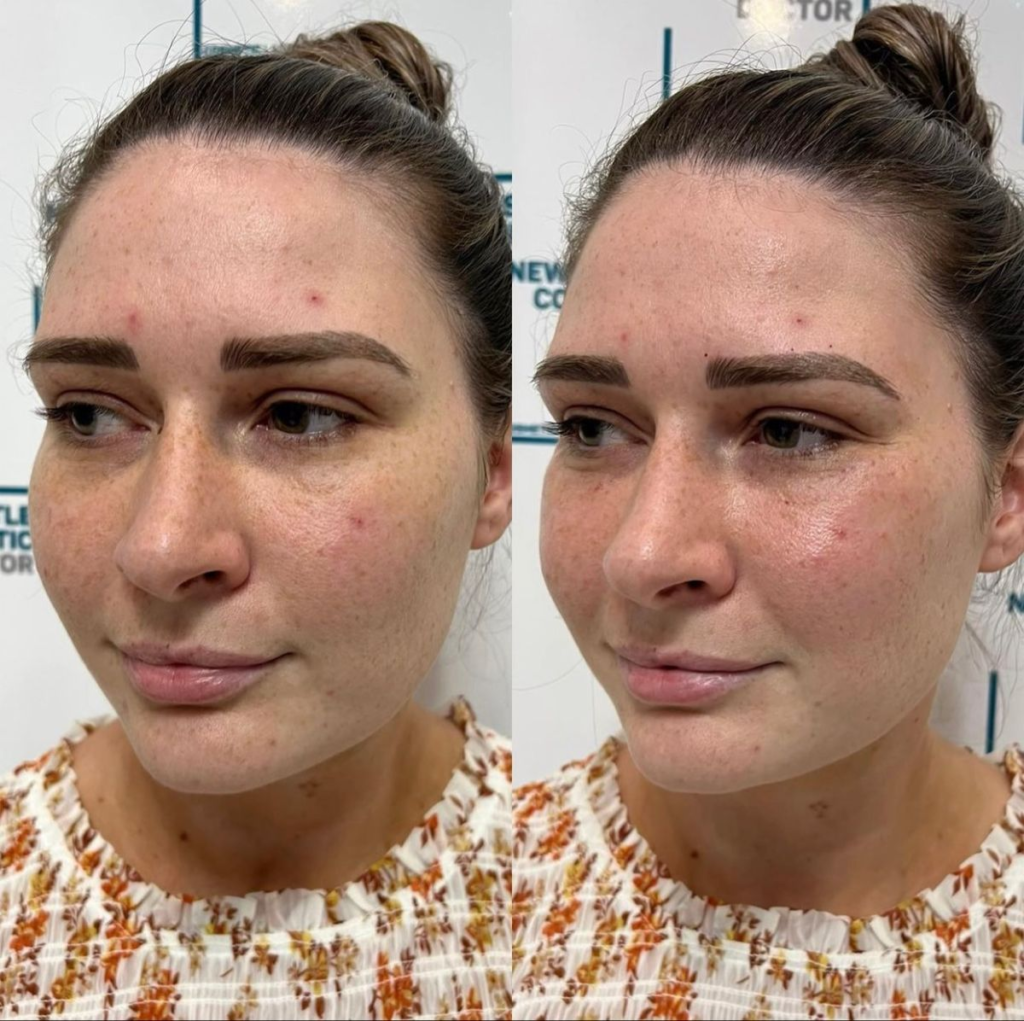
| 3. Aisha (Age 32) | Slight mid-face deflation, terrified of looking “overdone.” | 1.0 ML (Restylane Contour) injected superficially for soft volume. | $750 | A glowing, hydrated plumpness. Looks like she had a full 10 hours of sleep; completely undetectable. |
Tailoring Filler to Your Face Shape
Not every face needs the same needle placement. An expert injector analyzes your geometry:
- Round Face: Needs lateral (outer) placement along the zygomatic arch. This widens the top of the face, making the bottom look narrower and more V-shaped.
- Oval Face: Can handle both medial (front apples) and lateral placement to maintain balanced proportions without widening the face too much.
- Square Face: Soft, medial placement in the apples of the cheeks softens harsh angular jawlines, bringing a more feminine, heart-shaped look.
Protecting Your Investment
In Part 1 of our ultimate cheek filler before and after guide, we explored how dosages (1ml vs 3ml) and injection techniques act as structural support for different face shapes. Now, it is time to talk about the execution.
Achieving that flawless, settled “after” photo requires two critical things: using the right type of filler and strictly adhering to the aftercare protocols. The cheeks are a high-movement area, and how you treat them in the first 48 hours will dictate the longevity and symmetry of your results.
The Battle of the Brands (Which Filler is Best for Cheeks?)
Not all dermal fillers are created equal. Lip fillers are generally soft and flexible (low G-prime), allowing for natural movement. Cheek fillers, however, must act like bone. They need to be thick, structural, and able to lift heavy tissue (high G-prime).
Here are the top FDA-approved options your injector will likely recommend:
1. Juvederm Voluma XC (The Heavy Lifter)
- Composition: Hyaluronic Acid (HA).
- Best For: Patients needing significant volume restoration and dramatic lifting (e.g., the liquid facelift).
- The Vibe: Thick and robust. It provides an immediate, highly noticeable contour.
- Longevity: Up to 24 months (one of the longest-lasting HA fillers on the market).
2. Restylane Lyft (The Precision Sculptor)
- Composition: Hyaluronic Acid (HA).
- Best For: Creating sharp, distinct angles on the zygomatic arch (high cheekbones).
- The Vibe: Firm but slightly more malleable than Voluma. Excellent for the “snatched” model look.
- Longevity: 12 to 18 months.
3. Radiesse (The Collagen Builder)
- Composition: Calcium Hydroxylapatite (CaHA) – a biostimulatory filler.
- Best For: Older patients looking for long-term structural improvement.
- The Vibe: It provides immediate volume, but its real magic is that it forces your body to produce its own natural collagen over the next 3 to 6 months.
- Longevity: 18 to 24+ months (though the new collagen lasts even longer).
The Unfiltered Recovery Timeline (Day 1 to Day 30)
When you look at perfect Instagram pictures, you are seeing the settled results at Day 30. Here is the unfiltered reality of what happens when you leave the clinic.
- Day 1 (The Immediate Lift): You will look flawless right out of the chair, but your cheeks will feel tight, tender, and slightly numb.
- Days 2 to 4 (The “Filler Panic” Stage): This is when anxiety hits. Your cheeks will swell and may look 20% to 30% larger or slightly asymmetrical due to uneven fluid retention. Do not panic. Bruising (blue/yellow spots) may also peak.
- Days 5 to 14 (The Settling): The swelling drastically drops. Bruises fade and can easily be covered by makeup. The hard “lump” feeling begins to soften into your natural tissue.
- Week 4 (The True “After”): The Hyaluronic Acid has completely integrated with your facial tissue. It feels exactly like your own cheeks. This is the moment you take your final cheek filler before and after photos!
If you’re wondering about the exact timeline beyond this general overview, read our detailed breakdown of how long cheek filler takes to settle, including day-by-day changes and when final results truly appear.
Granular Aftercare (How to Prevent Ruining Your Results)
Your injector does 50% of the work; you do the other 50% at home. Follow these strict rules to ensure your filler doesn’t migrate or flatten:
- Sleep on Your Back: This is non-negotiable for the first 3 to 5 nights. Sleeping on your side can physically press the fresh, malleable filler into a different position, causing permanent asymmetry. Prop yourself up with a travel neck pillow.
- No Makeup for 24 Hours: Injection points are essentially tiny open wounds. Applying makeup too soon introduces bacteria deep into the skin, which can cause severe infections or nodules.
- Skip the Gym: Avoid rigorous cardio or heavy weightlifting for 48 hours. Increased blood pressure exacerbates swelling and bruising.
- Avoid Excessive Heat: No saunas, hot tubs, or hot yoga for at least a week to prevent inflammation.
Normal Side Effects vs. Dangerous Complications
While cheek fillers are overwhelmingly safe, they are still medical implants. Knowing the difference between normal healing and a complication is vital.
- Normal: Mild tenderness, swelling, bruising, and a tight sensation when smiling.
- Abnormal (Call your doctor):
- Severe, throbbing pain that gets worse instead of better.
- Skin that turns white (blanching) or dusky purple/grey.
- Note: These are signs of Vascular Occlusion—a rare emergency where filler blocks a blood vessel. It must be dissolved immediately with Hyaluronidase to prevent tissue damage.
Conclusion: Unveiling Your Best Self
The journey from your “before” to your ideal “after” is an exciting process of artistry and medical science. By choosing an experienced, board-certified injector, selecting the correct ML dosage for your face shape, and following strict aftercare, cheek fillers can safely provide one of the most stunning, confidence-boosting transformations available today.
Disclaimer
The information provided in this article is for educational and informational purposes only and does not constitute medical advice. Dermal fillers are medical implants that carry inherent risks. Always consult with a qualified, board-certified healthcare provider (such as a dermatologist or plastic surgeon) to determine if cheek fillers are safe and appropriate for your individual medical history and aesthetic goals.
References
For more authoritative information regarding the safety, approval, and risks of dermal fillers, please consult the following government and health organization resources:
FDA Official Approvals: Dermal Fillers Approved by the Center for Devices and Radiological Health
NIH Clinical Data: Safety and Efficacy of Hyaluronic Acid Fillers

Sophia Bennett is a dedicated aesthetic researcher and patient advocate with years of experience evaluating cosmetic treatments. Driven by a strict commitment to safety and transparency, she provides readers with evidence-based insights, authentic before-and-after expectations, and crystal-clear cost guides to help them make confident, informed decisions.
[…] To see how these early results compare to fully healed transformations, explore real cheek filler before and after results by ML, face shape, and technique. […]
[…] you’re unsure how these syringe amounts actually translate visually, check real cheek filler before and after results by 1ml, 2ml, and full-face transformations to see what each level of volume looks […]
[…] If you are unsure, start with 1ml. You can always add more at a follow-up appointment two weeks later once the filler has settled. For a deeper look at how different volumes compare across different face shapes, see our full cheek filler before and after guide. […]